React Signup Form Example
User authentication is a fundamental part of modern web applications, and the signup form is often the first interaction users have with your platform. In this guide, we’ll walk you through building a simple yet functional signup component using React JS.
Whether you’re a beginner or brushing up on best practices, this tutorial will help you understand how to manage form state, handle input validation, and integrate with a backend API.
Contents :
1. Setting Up the Project
Create react project using vite, Provide your project details as shown the below
C:\Users> npm init vite
√ Project name: ... signup
√ Select a framework: » React
√ Select a variant: » JavaScript
It will create React project in signup directory, move inside it and run the npm install command, It will download all the dependencies, Also install react-router-dom for creating routes in react application.
C:\Users> cd signup
C:\Users\signup>npm install
C:\Users\signup> npm install react-router-dom
Now start react application using npm run dev command
2. Building the Signup Component
Let’s create bootstrap react signup form in signup component, as shown in below snippet
import React from 'react'
import { useState } from 'react'

const Signup = () => {

    const [username, setUsername] = useState("");
    const [email, setEmail] = useState("");
    const [password, setPassword] = useState("");
    const [mobile, setMobile] = useState("");

    const handleInput = (e) => {
        //Handle Input
    }

    const HandleSubmit = () => {

        //Handle Form Submission

    }
    return (
        <div className='container register'>
            <form align="center" className="authForm" onSubmit={HandleSubmit}>
                <h3>Create New Account</h3>

                <div className="form-group">
                    <input type="text" required className="form-control" name="username" value={username} onChange={handleInput} placeholder="Name" />

                </div>

                <div className="form-group">
                    <input type="email" required className="form-control" name="email" value={email} onChange={handleInput} placeholder="Email" />
                </div>

                <div className="form-group">
                    <input type="password" required className="form-control" name="password" value={password} onChange={handleInput} placeholder="Password" />
                </div>
                <div className="form-group">
                    <input type="text" required className="form-control" name="mobile" value={mobile} onChange={handleInput} placeholder="Mobile" />
                </div>


                <div className="form-group">
                    <br></br>
                    <button type="submit" className="btn btn-dark btn-rounded">Signup </button>
                    <br></br>    <br></br>
                    <p className="">Already have account ?
                        <br></br>
                        <a href="/login" className="btn btn-link">Login</a> </p>
                </div>

            </form>
        </div>
    )
}

export default Signup
In React, you can manage form state using the useState hook by creating state variables for each input field. As the user types, onChange handlers update the corresponding state values to reflect the form data.
3. Handling Input Changes
Let’s see how to handle form inputs in React by using controlled components and updating state with the onChange handler.
    const handleInput = (e) => {
        if (e.target.name == 'username') {
            setUsername(e.target.value)
        } else if (e.target.name == 'email') {
            setEmail(e.target.value)
        } else if (e.target.name == 'password') {
            setPassword(e.target.value)
        } else {
            setMobile(e.target.value)
        }

    }
4. Submitting the Form
Let’s see how to submit form data to backend API using axios
 const HandleSubmit = async (e) => {

        e.preventDefault();

        try {
            const formData = {
                'username': username,
                'email': email,
                'password': password,
                'mobile': mobile
            }
            const response = await axios.post('https://your-api-url.com/signup', formData);
            console.log('Signup successful:', response.data);
            setMsg(res.data)
        } catch (error) {
            console.error('Signup failed:', error);
            setErrors(error)
        }


    }
5. Output
You can start your React app by running the npm run dev command in your terminal.
C:\Users>npm run dev
> signup@0.0.0 dev
> vite
  VITE v5.4.19  ready in 536 ms
  ➜  Local:   http://localhost:5173/
  ➜  Network: use --host to expose
  ➜  press h + enter to show help
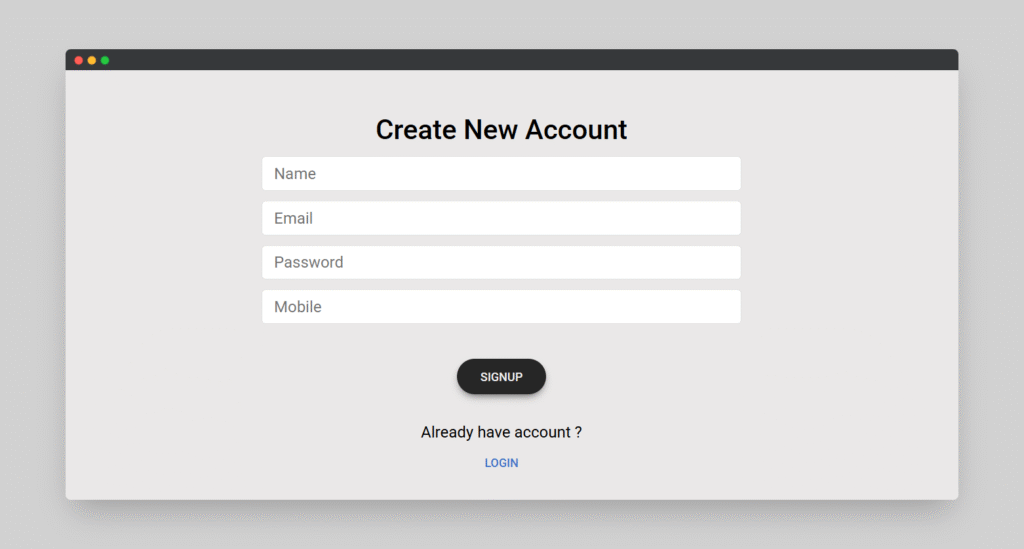
You can view your React signup form locally by visiting http://localhost:5173/ in your browser, as shown in the screenshot below.

6. Conclusion
In this guide, we learned how to create a functional signup form in React, manage form state using useState, handle user input with onChange events, and submit form data to a backend API using Axios. We also walked through how to push your React project to GitHub for version control and collaboration.
With these steps, you’re well on your way to building more dynamic and full-featured web applications. Keep practicing, and don’t hesitate to extend this form with validation, error handling, or integration with real authentication systems like Firebase or JWT.
Happy coding! 🚀


